Package Files and Organization
Jason M. Gleditsch 1
Sebastiano De Bona 2
Mathew R. Helmus 3
Jocelyn E. Behm 4
Last Updated: 07 April 2021
Source:vignettes/141_pkg_files.Rmd
141_pkg_files.RmdSummary
The basic structure of an R package is simple. Above is an example of a mock package called “packsample”. Here we will take a quick look at the components of this package (and of any package), some of which will be explained more in depth later on.
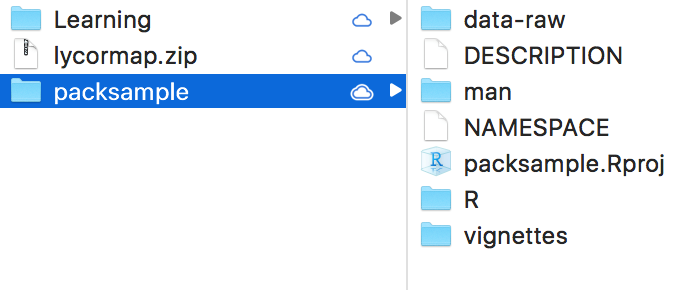
DESCRIPTION: the main text file containing metadata on your R package (e.g. who created the package, who helps maintain it, what are the CRAN packages required for the package to work etc.)
NAMESPACE: contains the names of the functions in your package. We will never manually edit this file, which will be automatically updated using Roxygen (a ready-made package for package development).
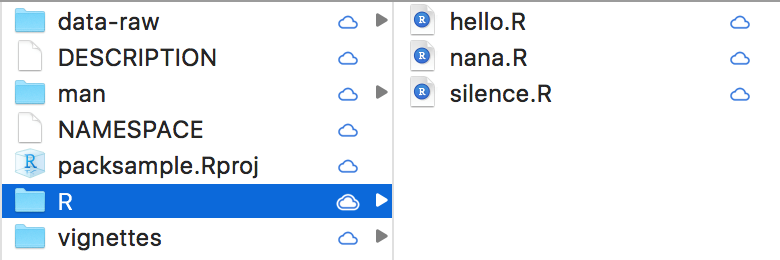
R/: a folder containing individual R scripts where the package function are stored and described.
man/: a folder containing the documentation for our functions which will be used to generate the helpfiles. These will travel with the package and can be accessed by typing “?name_of_the_function” in the console (substitute " name_of_the_function" with the actual name of your function). This folder, like NAMESPACE, will be automatically populated through Roxygen.
data-raw/: folder containing all data files (in .csv or .txt format) that are necessary for your analyses. It’s important to avoid naming this folder “data”, since a “data” folder is used to store .Rda files that are shipped with the package (simlarly to the data
mtcarscontained in the package “datasets”).vignettes/: this folder is the heart of your analyses. It contains a series of .Rmd vignettes that describe every step of the project, from data tidying and wrangling, to running models or simulations, to displaying the results through tables and plots. The Rmarkdown allows you to create a very thorough documentation, with text interspersed between coding chunks. Also it can be used to generate automatically documentation for your package using “pkgdown”.
packsample.Rproj: this is the RStudio project associated with our R package. It contains some metadata that allows you to always have the same interface every time you work on our package. Open this file anytime you want to work on your package, and it will automatically take you to the right folder and open up the vignettes, scripts and files you last worked on.
When creating a package in RStudio some of the files in the package folder are created automatically. In addition, some files and folders will be automatically populated.
Whether you’re starting your project from scratch, or turning a collection of R scripts into a package form, the process is pretty much the same. To create an R package, open a new RStudio session, go to File > New Project > New Directory and then select “R package”. In the prompted window, you can decide where to place your new package folder and, crucially, a name for your package. For tips on naming and many other useful guidelines, please see Hadley Wickham’s awesome R packages book (freely available HERE). Also, you can tick the box “create a git repository” for version control (see the section Version Control using git, below). Creating the package this way will automatically create a DESCRIPTION and a NAMESPACE file, and R/ and a man/ folder, and an .Rproj file. You can then create a data-raw/ and vignettes/ folder manually. All information on how to create and populate an R package can be found in Wickham’s book. Below are some quick tips on how to fill and organized the files and folders in your package. By following the tips below you will have a package structure. Making it into a working package will take very few extra steps.
DESCRIPTION & NAMESPACE

The DESCRIPTION file is made of headers that define different fields. As soon as you create a package, you should update this file. Make sure you fill the Title field (one sentence to explain what the project/package does), the Description field (a few sentences to expand upon the title) and the Author@R field (with your name and the names of your collaborators; “aut” and “cre” defines the roles as Authors and Creator of the package). A key component of the file is the list of Imports, which details all CRAN packages your project (and therefore your R package) depends on. It’s good to keep this up to date anytime you add new dependencies to your project.
As mentioned above, the NAMESPACE file will be automatically updated by Roxygen. Just type into it # Generated by roxygen2: do not edit by hand and save the file.
R/
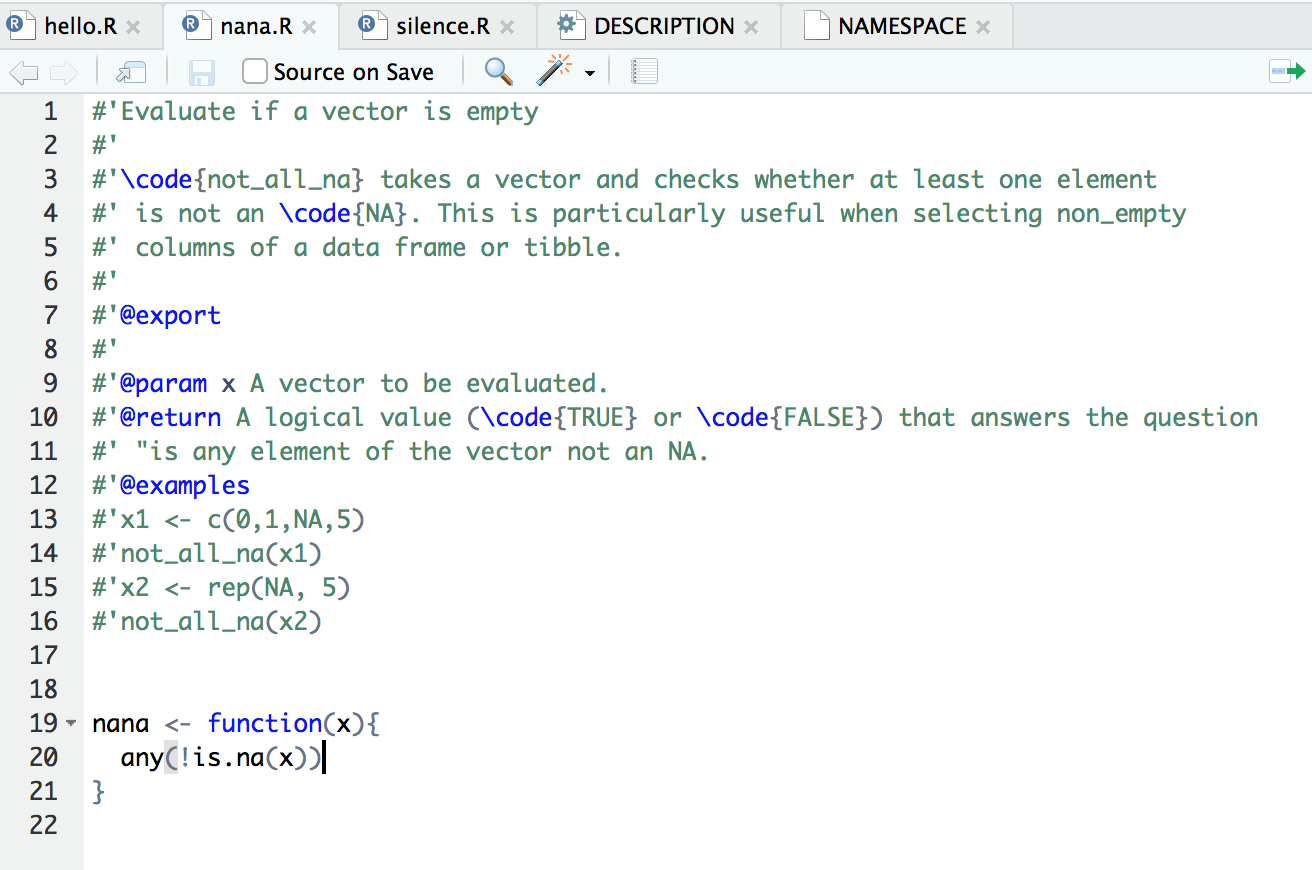
This folder contains your custom functions, stored as individual .R scripts. Below is an example of (too) few functions.
Each function as the same structure: a header defining its documentation (where each line starts with #'), and a body containing the code that defines the function (as below). The first line of the header is translated into a short title of the function. The text that follows, separated by an empty line, describes more in detail what the function does. The different headers starting with the at (@) symbol represents parts of the documentation: @params defines the arguments of the function; @return the output of the function; @examples some code to be used to understand how the function operates, etc. Finally, the @export is necessary to ensure the function’s documentation is written out.
vignettes/
The bulk of a typical CRAN package (like dplyr or lme4) is made by functions and their documentation. This is due to the fact that most published packages provide a toolkit for R users to wrangle data, run analyses, or visualize data and results. In the case of a private R package for a project, like the one we are describing here, the bulk of the package will be in the form of rmarkdown scripts to tidy data, run analyses, and show the results with pretty plots. The vignettes/ folder should contain all scripts (in Rmarkdown format) describing and running the analyses. The scripts should be named using the following convention:
\[<Number>\_<Short \space informative \space name>.rmd\]
starting with a consecutive numbering, followed by a descriptive brief name (separated by underscore (i.e "_") and without spaces).
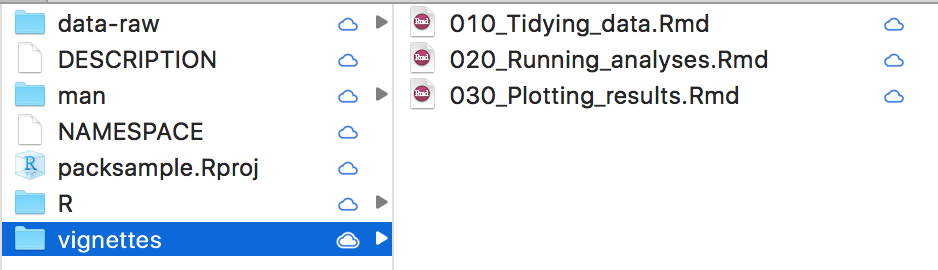
Numbering the scripts in chronological (and logical) order ensures anyone can access your scripts and know where to start and how to proceed. Moreover, it ensures the scripts are run in the correct order when they are automatically run by pkgdown (which we won’t go into details about here). Please, make sure you comment each script thoroughly. At last half of your rmarkdown scripts should be in the form of text, with each chunk of code well explained. Always ask yourself the question: “will someone accessing my package with no prior knowledge of it understand what’s going on here?”. If the answer is “maybe”, add more comments. Another good practice is to keep a consistent structure to each vignette. The script should be articulated in three parts:
Aim and setup: where the purpose of the vignette is described, the required packages are attached, and the necessary data and/or objects are loaded.
Main body: where the actually coding happens (and is thoroughly described).
Saving: where all the objects to be required by future vignettes are saved. All saved objects can be stored inside the vignettes folder, or in additional folders “parallel” to the vignettes folder (such as results/ and/or figures/).
sandbox/
This last folder (which you will have to create by hand) becomes extremely useful if you’re transforming an existing project into an R package. A good way to do this is to start by creating a new package and then migrating your code, piece by piece, into your package. While you do that, you can copy all of your old project scripts (whether they are in .R or .Rmd format) to your sandbox folder. Then proceed to transform them into either functions (that will go into the R/ folder) or vignettes. As you transform your old code, remove it from the sandbox. This folder is also useful to host code that has become obsolete or useless, but might be recovered later, or scripts that have not made it into the mainstream of your project yet, but might in the future.
Temple University, jmg5214@gmail.com↩︎
Temple University, sebastiano.debona@gmail.com↩︎
Temple University, mrhelmus@temple.edu↩︎
Temple University, jebehm@temple.edu↩︎